
By Sarah Hughes
Spring is here. Here is a way to get away from obnoxious pastel colors wrapped in plastic pink grass, but still have seasonal decorations.
Materials:
- Fake paper or ceramic eggs (you could use real eggshells with the egg carefully blown out through small holes – don’t swallow. Or squeeze too hard for that matter).
- Acrylic paint in desired colors (I prefer Americana brand and drew inspiration from 1960s knickknacks #hipster #didntsoundasannoyinginmyhead).
- A variety of paintbrushes
- Paint pens (which make details easier).
- Water in a cup safe to clean brushes with.
- Some drop cloths or old newspapers to protect your crafting surface.
- Somewhere to allow eggs to dry that touches the freshly painted egg minimally. It could be an empty egg cartoon. A cut-up paper towel roll might work well too.
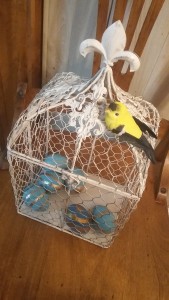
- A cool vessel to put the eggs in when you’re done (Try a birdcage or a cool dish. Maybe fashion a nest – there’s a cool way to do it with papier-mâché materials and string).
- A ruler or a stencil if you’d like it to be neat (#nope).
- You can use masking or artist tape to tape out stripes (just don’t press it down to hard – the goal is for it to be removable later).
- (Optional) a cute little clip-on creature – butterflies, birds, beetles.
How to:
- Decide on a pattern. You can cut it out from a simple picture to make a stencil, or try to free hand. Visualize your pattern on the egg. If you want to do this fast, consider a more abstract or simple design like paint splatters, stripes or dipping/ rolling the paint on.
- Apply base coat to the egg. Let it dry. If you are using the paper eggs this will go quickly (perhaps 20 minutes to dry). Check your egg carefully for wet spots.
- Apply a second coat of the same color if the first coat looks sheer or uneven. Allow this to dry. It should take approximately the same amount of time as the first coat to dry.
- Tape-off or measure out your design on the egg. Just make sure whatever you do is removable (pencil usually shows through paint and tape must be applied gently). In general, the more time you spend laying out or measuring for your pattern, the more professional the end result will look, but the more time it will take for the entire project.
- Paint details in a noticeably different color. Allow to dry the same time as before.
- Add details and outlines with a paint pen. Dry as before.
- Arrange in container of choice. Add optional flying friends.
Now stand back and enjoy your grown-up seasonal centerpiece and stay tuned for more design ideas.